


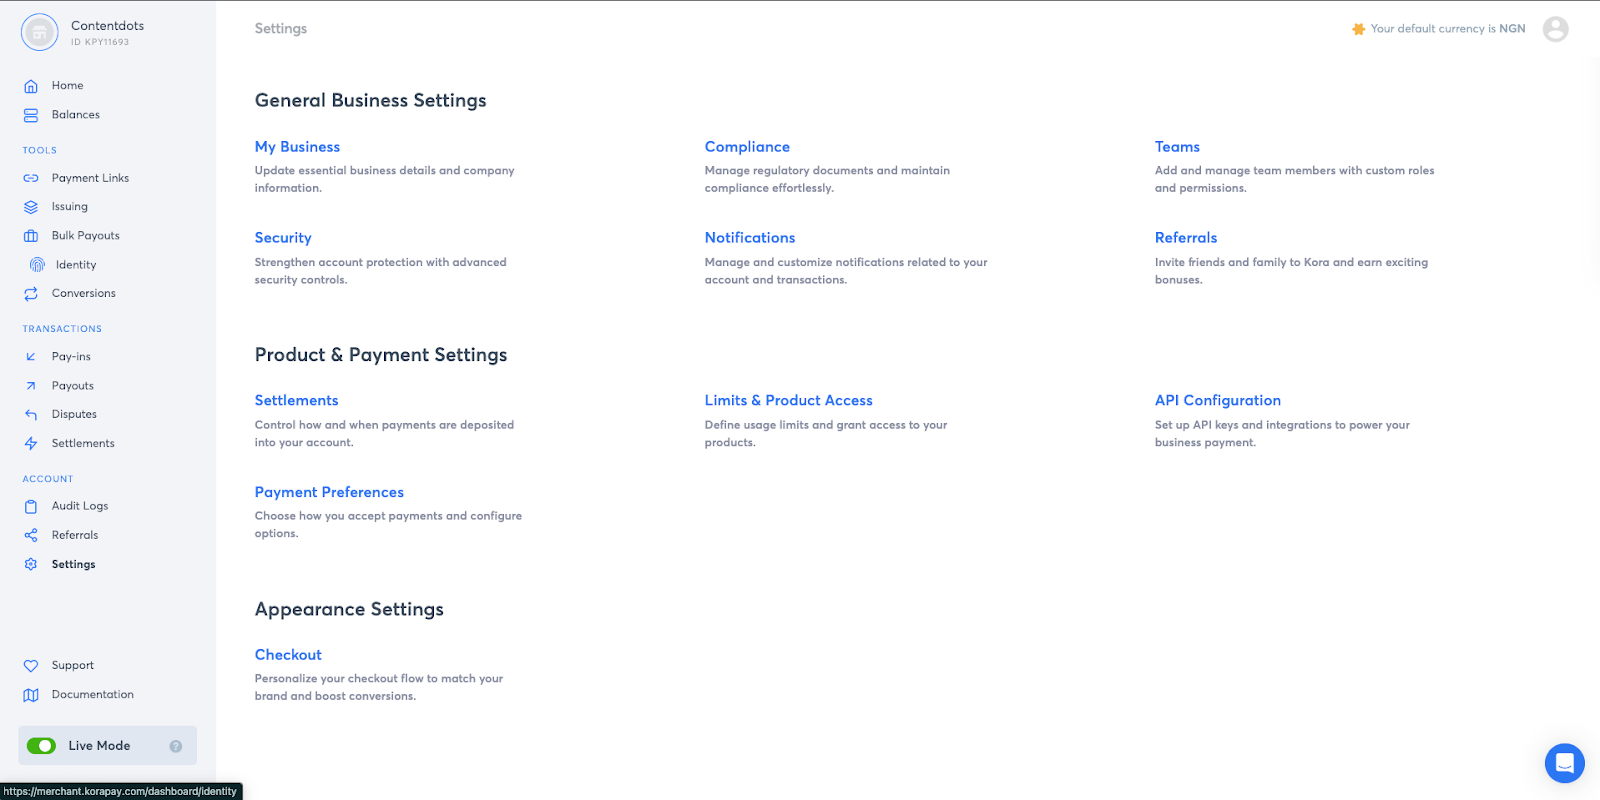
Table of contents
Editor's note:
Starting with a new payment processor shouldn't be stressful.
But we understand that sometimes using a new payment platform can be confusing, whether switching from another payment processor or onboarding Kora as your first payment processor.
In this blog post, we’ll walk you through the top six features on Kora that might seem a bit confusing. This guide will show you how these features work on Kora and help answer any questions you might have.
1. Switching the settlement account
One of the most common requests we get from new merchants is help with switching their settlement account. Here's the thing: you can actually do this yourself through your dashboard. No need to contact support. On Kora, we settle your funds based on your preferences. This could be your Kora dashboard wallet or a business bank account. We have to verify this bank account before we can settle your funds there for due diligence.
If you transact in multiple countries, we can also settle your funds in your preferred currency. For example, if you’re a business in Nigeria selling to customers in Ghana, you can accept Ghanaian Cedis and settle in Naira. This feature is disabled by default on your dashboard by default. Contact us to get access to it.
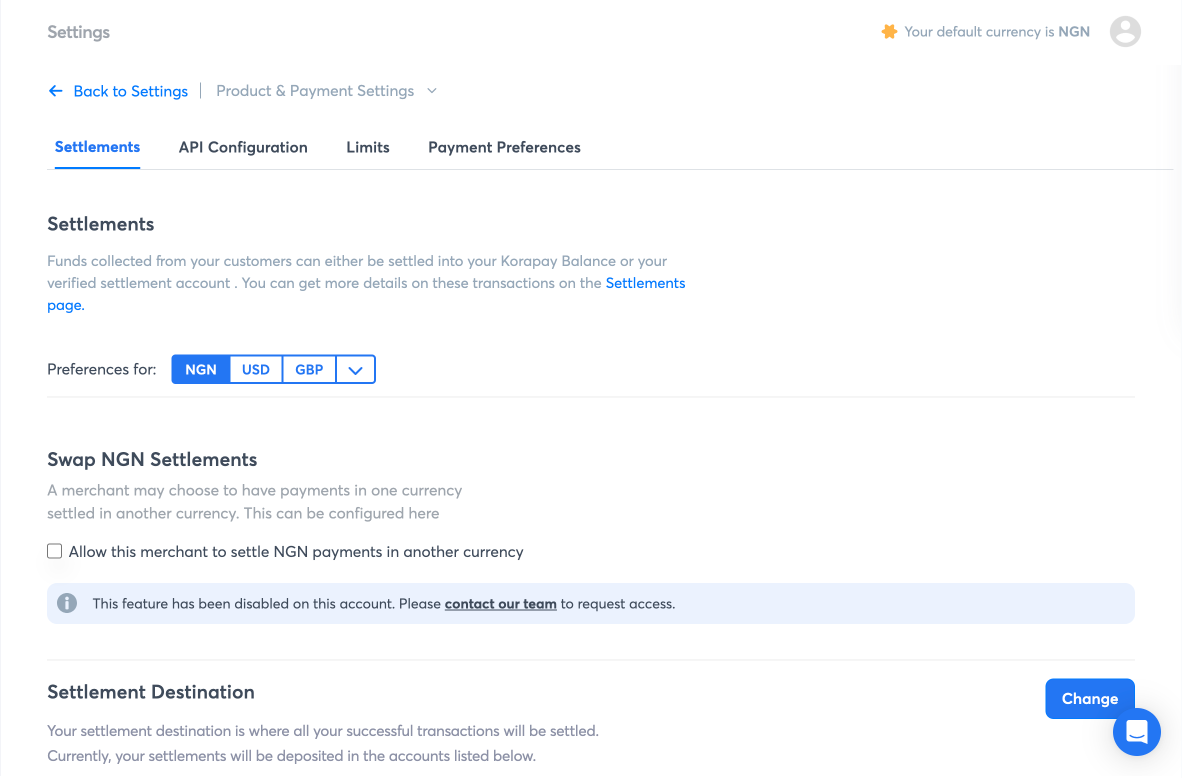
The account you provide during your onboarding becomes your default settlement account. But switching to a different account is straightforward once you know where to look. Simply head to Settings and go to the Settlements tab. Then, click on Replace Bank Account. Select the currency you want to settle, choose your bank, and add the account number.
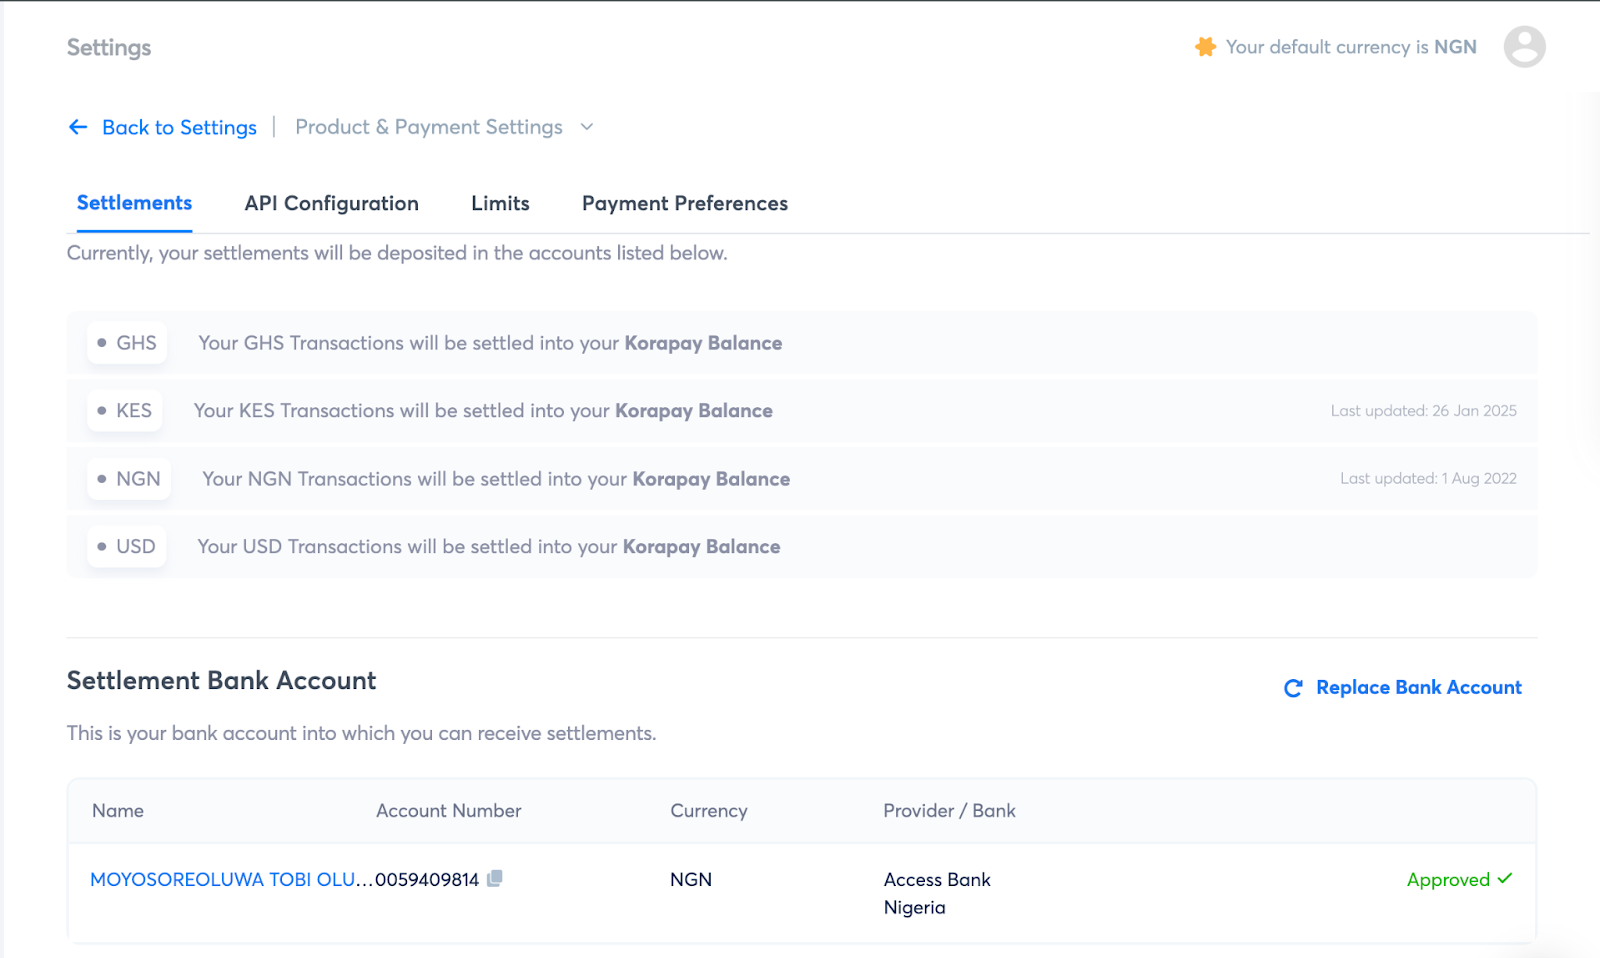
Many merchants don't realise this feature exists in their dashboard and assume they need to email us for help. But once you know the process, managing settlements becomes very smooth on the Kora dashboard.
2. Handling underpayments and overpayments
For merchants who want to use our fixed and dynamic bank accounts, we understand that sometimes, there are situations when a customer overpays or underpays the expected amount. Kora gives you control over what happens if any of these two situations occur on your dashboard. To access it, check the left panel section on your dashboard. Then, click on Settings and click Payment Preference. Then, select the currency you want to set up.
In a case where a customer overpays, you can decide to do three things: accept the amount, return it all or return the excess amount. For instance, let’s say a customer pays you NGN105,000 instead of NGN100,000. If your preference is to Return Excess, Kora will refund NGN5,000 to the customer. If it’s set to Accept, Kora will accept the payment, and if it’s set to Return All, Kora will reverse the entire amount. The default setting for this is to return the excess amount. For underpayments, you can either choose to return the entire amount or accept it. The default preference on the Kora dashboard is to Return All.
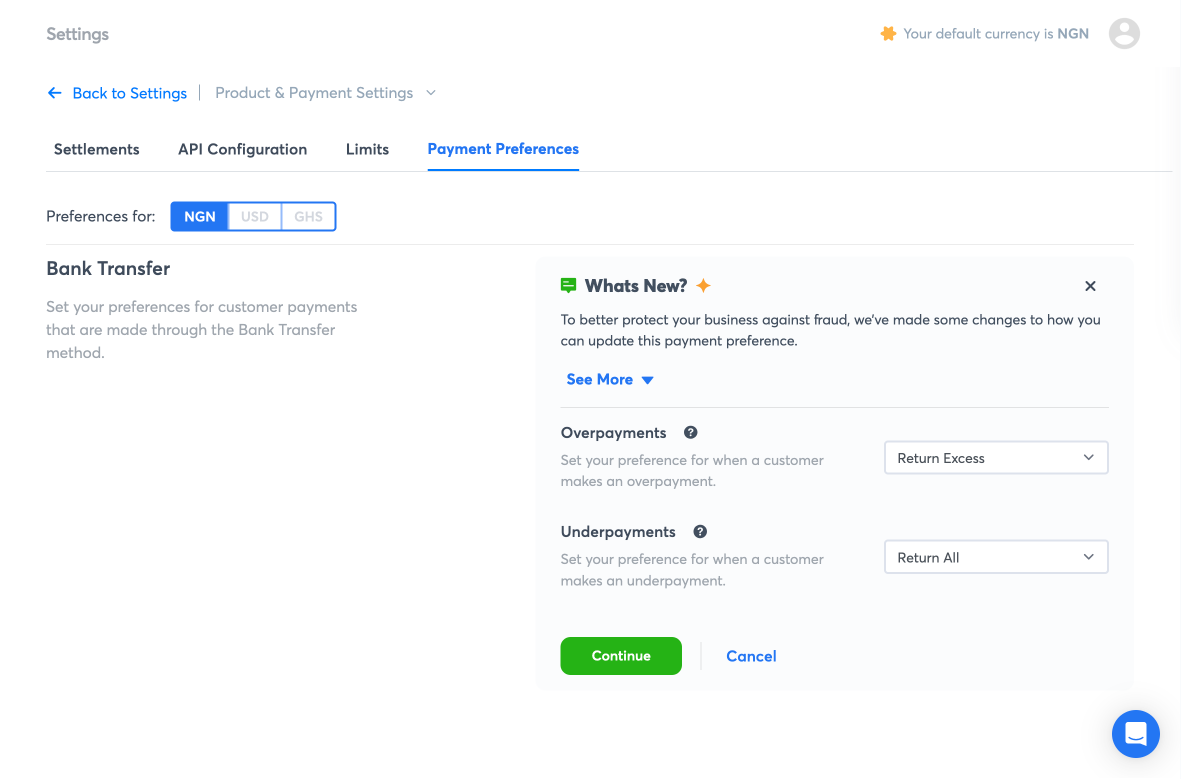
To change this preference on your Kora dashboard, you’ll need to provide an authorised signatory from your company who'll sign and upload an attestation letter before Kora makes these changes. We do this to secure your account.
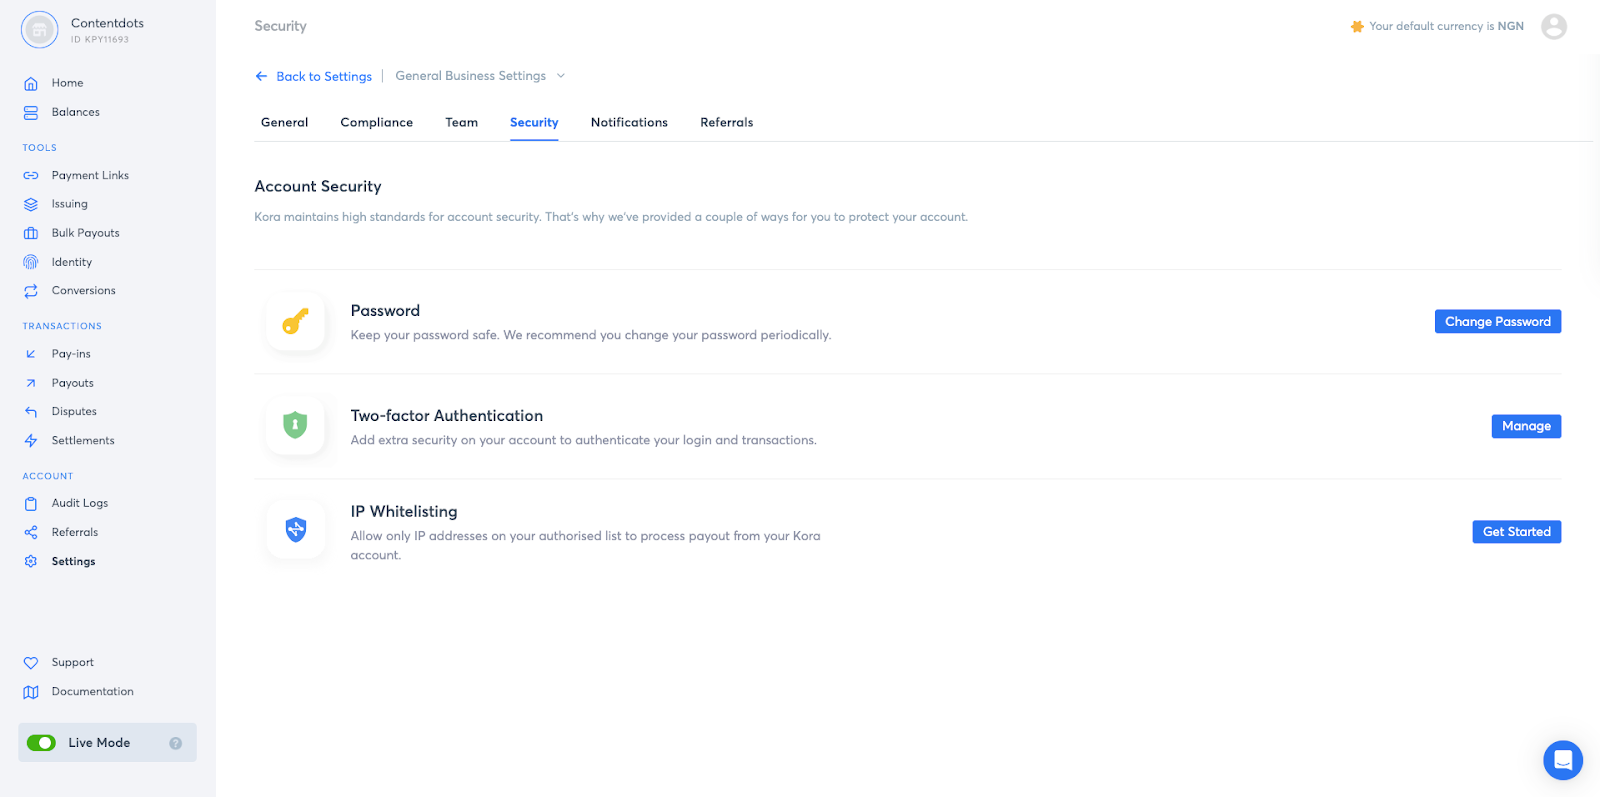
3. IP Whitelist for payouts
With the Kora payment engine, you get best-in-class security to protect yourself from security breaches like Multi-factor Authentication and Approver-Initiator for Payouts. But IP Whitelisting is one of our favourite features to protect your Kora account from bad actors.
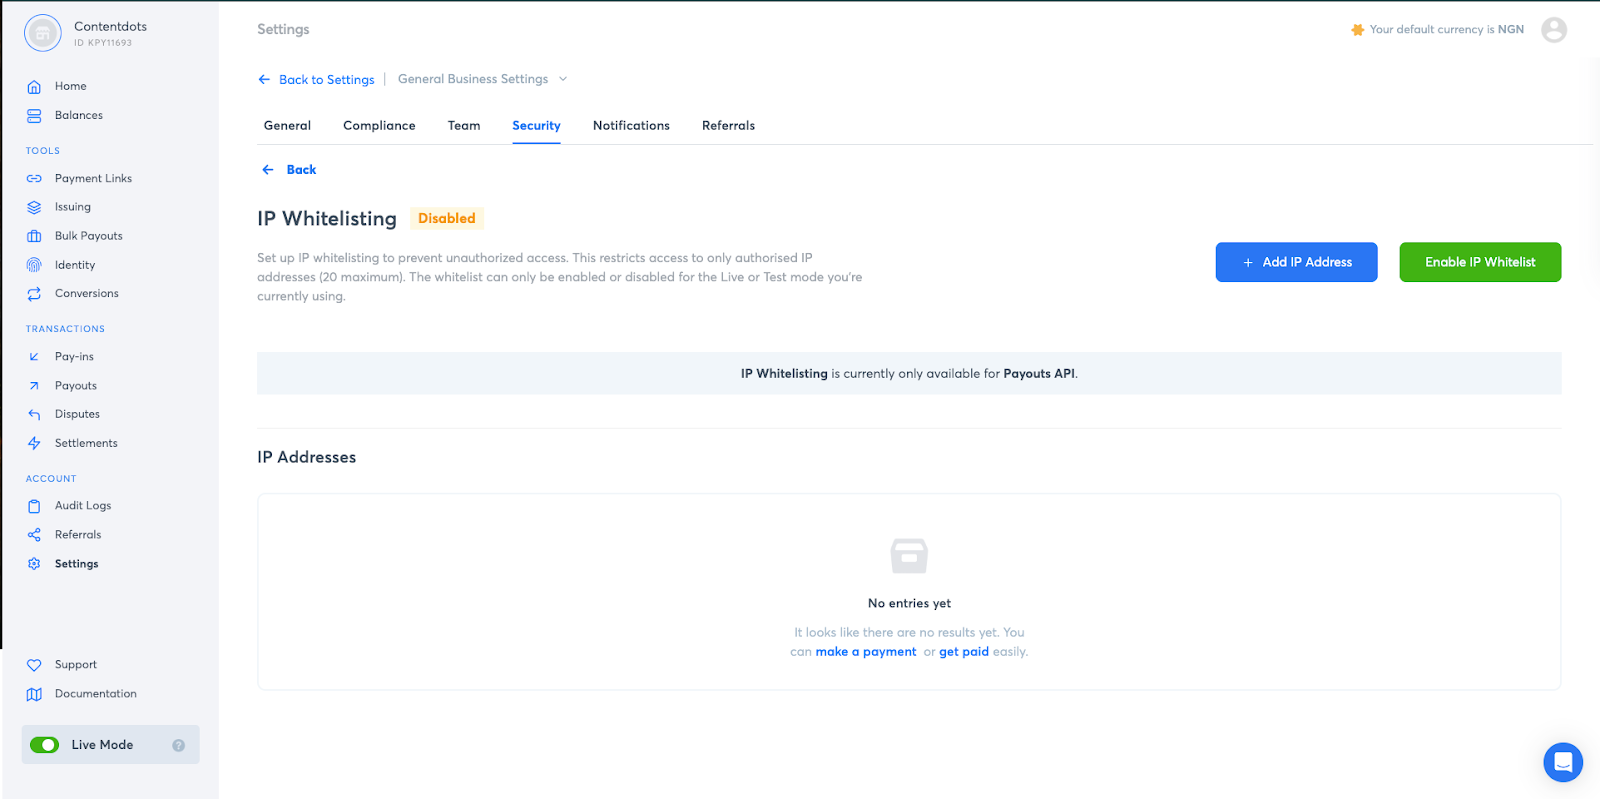
This security feature ensures that only authorised team members can initiate payouts by restricting payout access to whitelisted IP addresses. By default, admins and account owners can make payouts, but any other team member without admin or owner access to your dashboard cannot complete payout transactions until you whitelist their IP address. This is particularly important for new users who may not be aware of this security requirement. When they attempt to make a payout and it fails, it's often because someone who has Admin or Owner rights hasn’t whitelisted their IP yet. It ensures that only you or your team members can access your dashboard by restricting dashboard access to only authorised IP addresses.
To use this security feature, head to the Settings tab on your dashboard.
Then select Security. After, click on the Get Started button beside the IP whitelisting option.
Click on Add IP Address, and you'll see a modal to input the IP address you want to whitelist.
The dashboard will then display a modal requiring you to input your 2FA code from your authentication app. Once you input the code, we will whitelist the IP address.
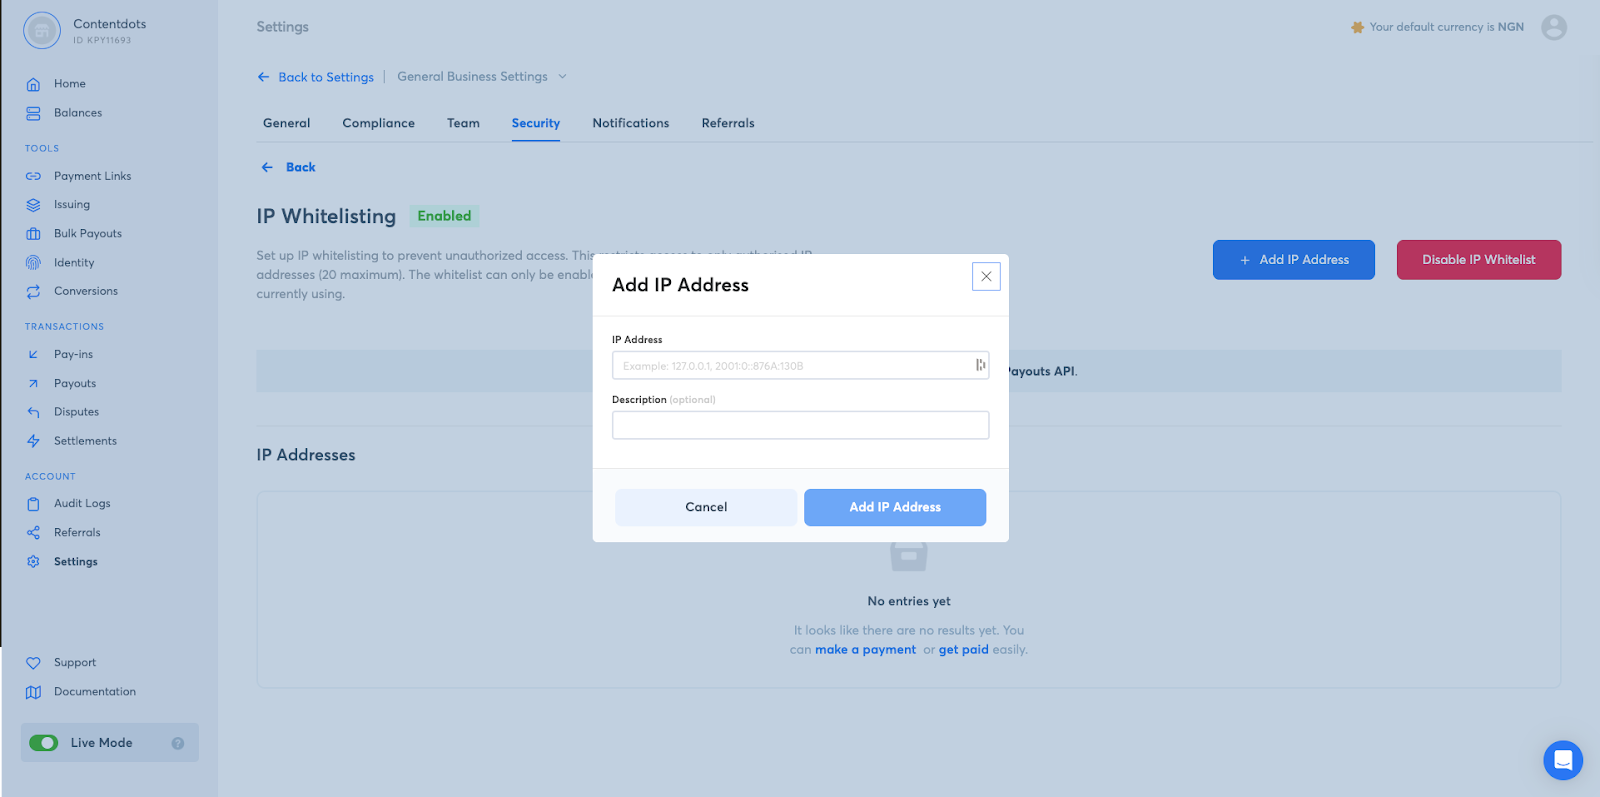
You can repeat this process to add up to 20 IP addresses on your dashboard. We implemented this additional security layer to ensure companies have full visibility and control over who can initiate payout transactions, taking security a step further than other platforms.
4. Transaction fee configuration
When you create a Payment Link, you can initially choose who bears the fees during the setup process on your dashboard. However, once set up, you have to make any changes to the fee structure via API. For example, if you initially set your business to bear the transaction costs but later decide to pass these fees to your customers, you'll need to implement the change through our API.
We understand that not every business has the technical ability to execute this, so our support engineers are always available to help. Reach out to us here
5. Switching the dashboard environment (Live vs. Test Mode)
Kora's dashboard has a unique characteristic regarding its "Live" and "Test" modes. In Test Mode, you can simulate different scenarios with the dashboard. Think of it like a mirror dashboard you can experiment with without affecting your main account. This way, you can try out different features on Kora and learn how they work.
If a team member switches the account into "Test Mode" to run a test, the entire account for all team members is switched to Test Mode. This can disrupt operations if you don't coordinate it carefully. Any team member–regardless of the type of access they have– can switch your Kora dashboard from Live Mode to Test Mode.
6. Sub-accounts
Sub-accounts are separate accounts businesses typically use to manage different verticals, divisions, or merchant categories under the same primary account.
Kora does not currently support the creation of multiple sub-accounts under a single primary account. Instead, merchants who need sub-accounts have to sign up and create entirely separate accounts with the same email and KYC details they used for the primary account, making the setup process faster and more streamlined. In such cases, your existing account remains your primary account, while the newly created account acts as a sub-account.
Conclusion
Switching platforms can be daunting for businesses, but with the right support, it’ll be as smooth as butter. That’s why we wrote this guide to help ease your setup on Kora whether you’re switching from another payment infrastructure or onboarding on a payment platform for the first time.


.png)


%201.png)
%201.png)

%201.svg)


%201.png)
%201%20(1).png)